Can't be installed together with the following solution: Explicit Priority for Work Items (no affect to Rank) (a8ddf256-74c4-4d2d-b932-7f69586ded3c) ----------------------------------------------------------------------------------------------------------------------------------- Solution Overview The solution is designed to visualize the priority of items in a backlog via integer numbers explicitly
Trusted by Agile teams at
show more
USER STORIES:
Can't be installed together with the following solution:
- Explicit Priority for Work Items (no affect to Rank) (a8ddf256-74c4-4d2d-b932-7f69586ded3c)
-----------------------------------------------------------------------------------------------------------------------------------
Solution Overview
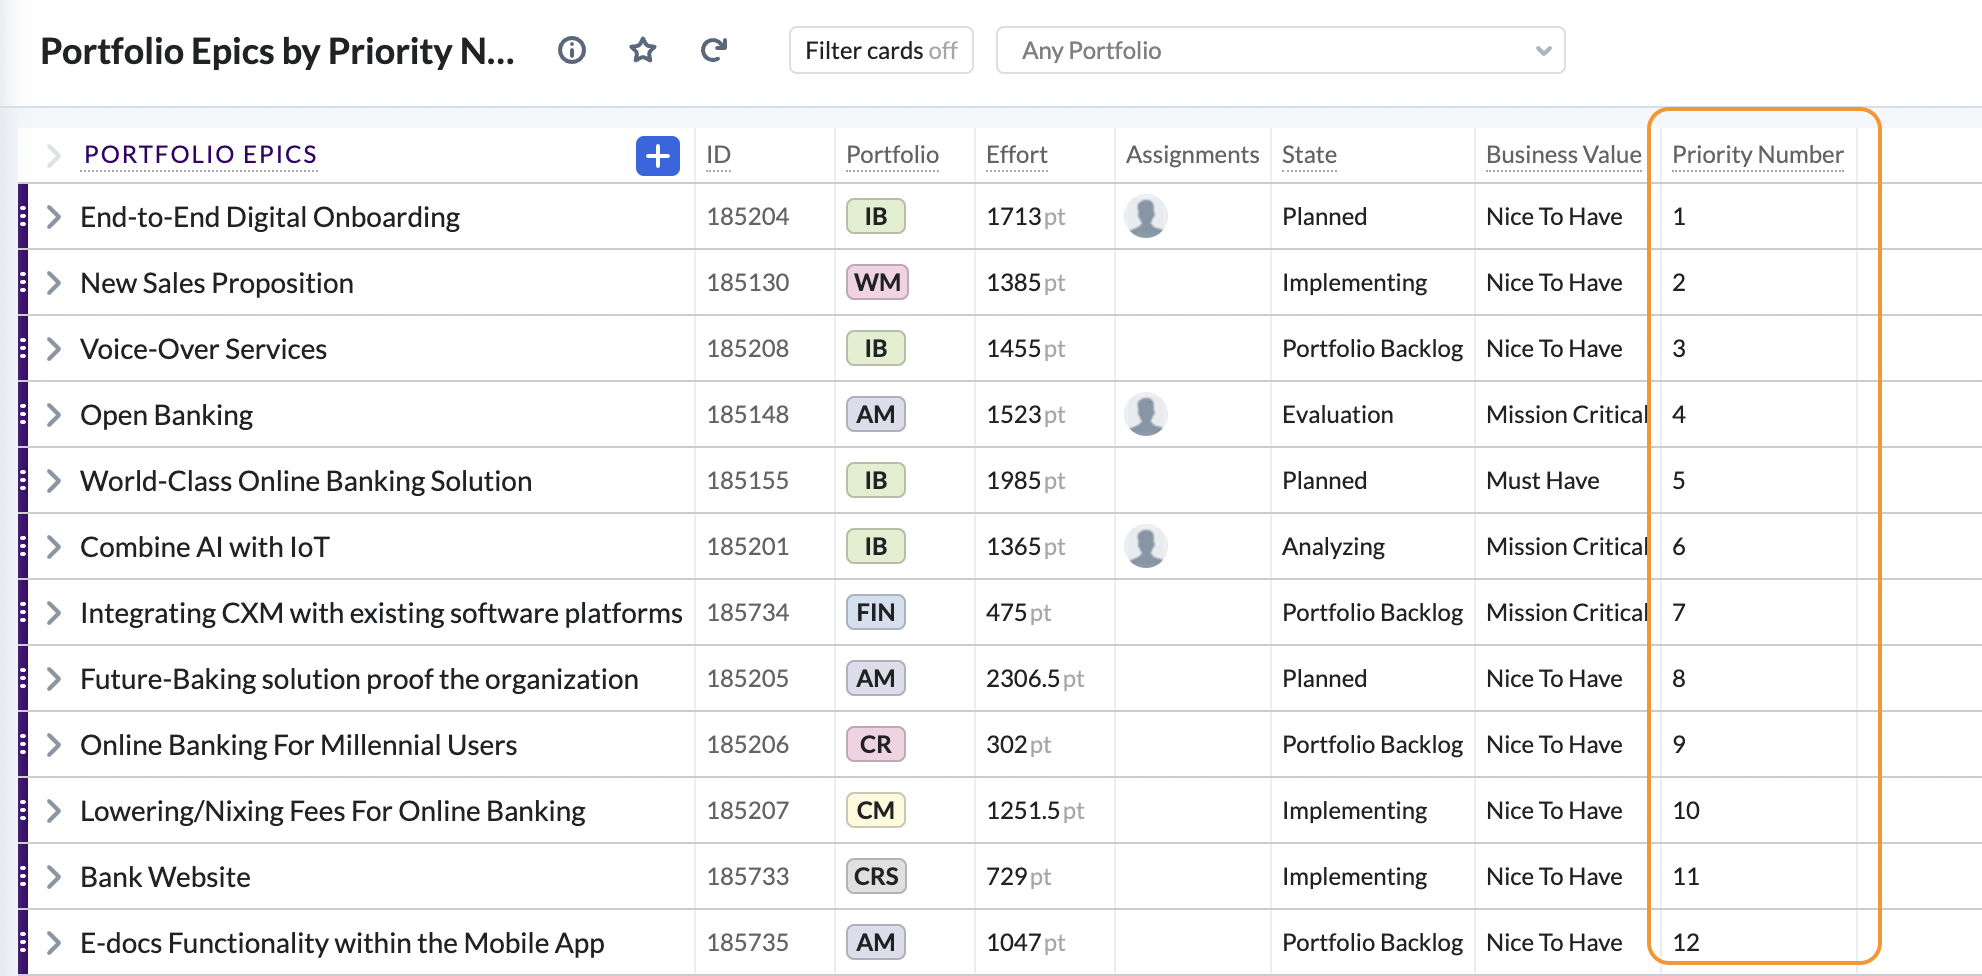
The solution is designed to visualize the priority of items in a backlog via integer numbers explicitly so that Product Owners, Solution Owners, and Key Stakeholders can easily define the priorities of items in a backlog and other people in the organization can understand the priority of each item by just looking at the number.
It enables the Priority Number field for each item (by default for Portfolio Epic and Epic), where you'll see the explicit priority of an item in a backlog based on its Rank. The higher the priority, the lower the number.
It allows to either set Priority Number manually (which will update an entity Rank and put a Work Item to the appropriate position in a backlog):
... or prioritise the items in a backlog by drag and drop (which will update the Priority Number of a Work Item).

Prioritisation can be made either within a Portfolio, within all Portfolios or in a specific category (values in a drop-down list custom field). For example, suppose you have a Reporter custom field with values Internal and External, and would like to set priority numbers for each value separately. In that case, you can configure the rules to use that field values.
Solution Configuration
Add/Change the Entity type
By default, the solution sets Priority Number values for Portfolio Epics and Epics. If you'd like to use it for another entity type (for example, Feature), do the following:
- Go to Settings -> Custom Fields
- Add a new Priority Number non-system custom field of type Number
- Go to Settings -> Automation Rules
- Open the following rules one by one:
- PNC_1_of_7_Priority Solution Pre-Setup
- PNC_2_of_7_Update Priority Number when Entity State, Rank, Project or Group By Custom Field is updated
- PNC_3_of_7_Update all entities when Priority Number is updated Manually
- PNC_4_of_7_Update first page of entities when Priority Number is updated by Rule
- PNC_5_of_7_Update second page of entities when Priority Number is updated by Rule
- PNC_6_of_7_Update third page of entities when Priority Number is updated by Rule
- PNC_7_of_7_Initial Priority Number calculation Main Rule
- Replace the entity at the trigger section (by default Portfolio Epic and Epic) or add the needed entity type:
- Click JSON tab
- Update Parameter Values:
- Add a new block of values for Feature or replace the entity name at the existing blocks for Portfolio Epic or Epic
- Click Save button
Apply the solution to only specific set of entities / use other name for Priority Number field (optional)
The are the following parameters that can be changed if needed:
Common property:
- cfPriorityNumber – it defines the name of a custom field (by default Priority Number), where you store the Priority Number. If you'd like to name it differently, provide the custom field's name here. The field should have the same name for all the entities.
Entity-specific settings (can be set for each entity separately):
- cfGroup – by default, it's set to null, which means you won't prioritize within custom field values. Set the needed custom field name here to prioritize within a specific category (custom field values). Format: "Custom Field Name", e.g. "Value Type". Please see the details below, at "Configure Prioritization within a category (Custom Field values)" section.
- excludeStates – if you want to exclude some states from prioritization, then add the name of the states. Format: "Entity State Name", e.g. "In Progress"
- groupByProject – by default, the parameter is set to false, which means prioritization will happen across all the Portfolios (Projects) in the system. Set it to true if you'd like to set Priority Number within each Portfolio separately.
- excludeFinalState – set it to true, if you want to exclude entities in the Final state from prioritization
- excludeInitialState – set it to true, if you want to exclude entities in the Initial state from prioritization
To update the rule parameters, please do the following:
- Go to Settings -> Automation Rules
- Open the following rules one by one:
- PNC_1_of_7_Priority Solution Pre-Setup
- PNC_2_of_7_Update Priority Number when Entity State, Rank, Project or Group By Custom Field is updated
- PNC_3_of_7_Update all entities when Priority Number is updated Manually
- PNC_4_of_7_Update first page of entities when Priority Number is updated by Rule
- PNC_5_of_7_Update second page of entities when Priority Number is updated by Rule
- PNC_6_of_7_Update third page of entities when Priority Number is updated by Rule
- PNC_7_of_7_Initial Priority Number calculation Main Rule
- Click JSON tab
- Update the parameters mentioned above. Please note that the parameter values should be the same for all the rules
- Click Save button

Configure Prioritization within a category (Custom Field values)
To perform prioritization within a category (custom field values), you'll need to do an additional configuration. Please note that the only custom fields of type Drop-Down List can be used in the solution.
- Please make sure you provided the name of the custom field in all the solution rules, as described in the beginning of the Solution Configuration section.
- Adjust trigger at the Automation Rule:
- Go to Settings -> Automation Rules
- Open the following rule:
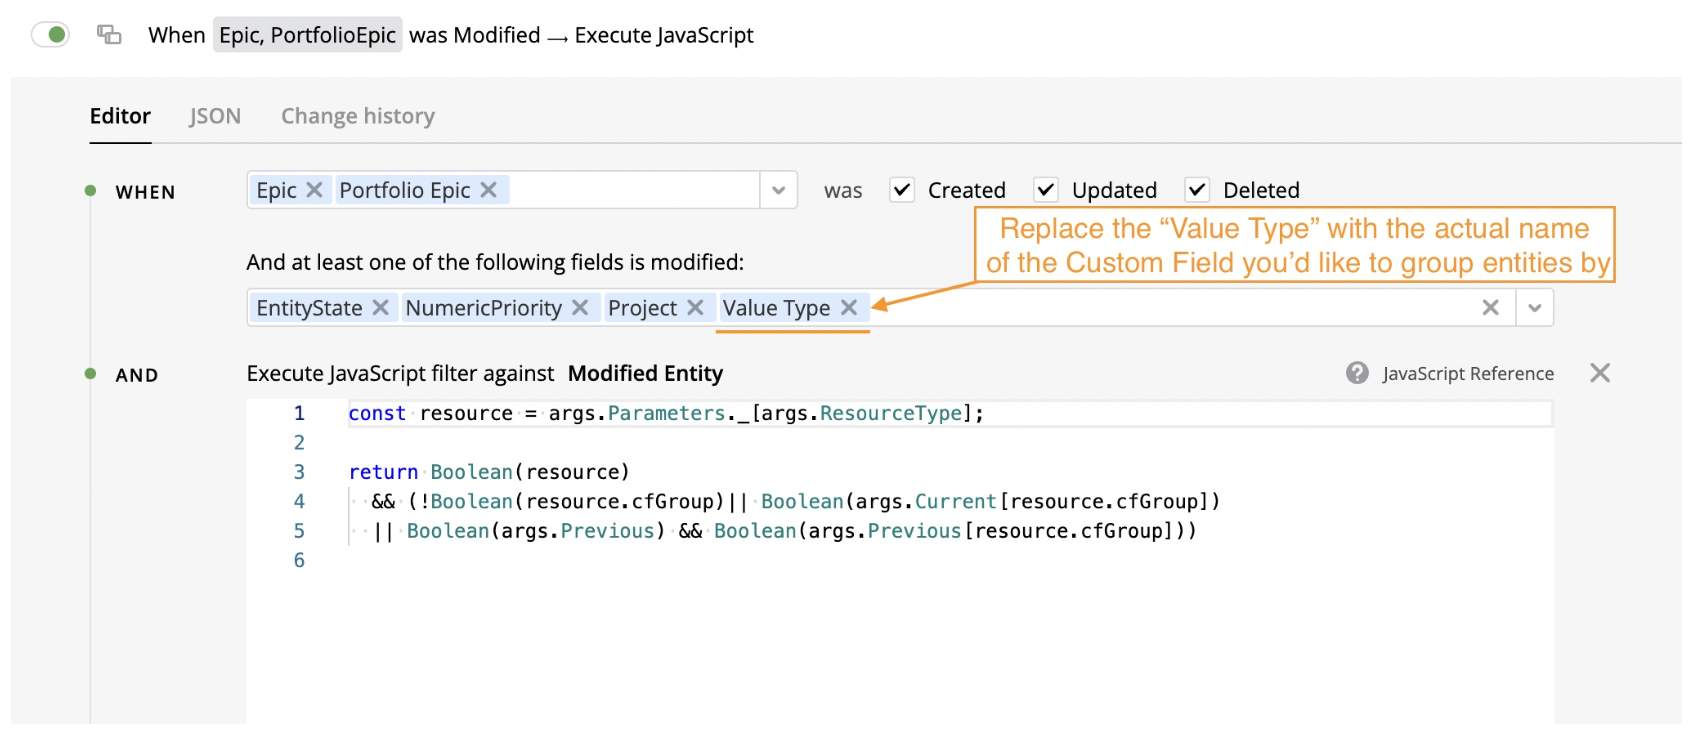
- PNC_2_of_7_Update Priority Number when Entity State, Rank, Project or Group By Custom Field is updated
- Replace the predefined Value Type value by the needed Custom Field Name in the rule trigger section
- Click Save button
Set Priority Number for existing entities
If you already have entities in the system, we need to trigger the initial calculation of Priority Numbers for them. They will be set based on the entities Rank. To do that:
- Ensure that all the Automation Rules have the requires settings set
- Go to Settings -> Automation Rules
- Enable and open the following rule:
- PNC_1_of_7_Priority Solution Pre-Setup
- Click Save and trigger now button
--------------------
Version 2.2
Integrations
See how Targetprocess aligns and empowers business and IT with the help of powerful integrations.
Targetprocess facilitates enterprise agility at all levels by enabling both Business and IT to work in one holistic solution. To help ensure value flow visibility and collaboration across the entire enterprise, Targetprocess allows a powerful set of integrations covering use cases for different levels and roles within organization.
For Transparency above the Team Level
EXPAND 2 INTEGRATIONS
For Transparency above the Team Level
EXPAND 2 INTEGRATIONS
For Continuous Integration and Continuous Delivery
EXPAND 6 INTEGRATIONS
For Continuous Integration and Continuous Delivery
EXPAND 6 INTEGRATIONS
For Product Management, ITSM, Sales and Marketing to Stay on the Same Page
EXPAND 5 INTEGRATIONS
For Product Management, ITSM, Sales and Marketing to Stay on the Same Page
EXPAND 5 INTEGRATIONS